In architecture, you need to briefly and clearly explain to the client what your entire proposal is about.
It costs the client a lot of money and effort to have a house built, so it is important to clarify during the design phase exactly what the client wants and whether the architect meets all the client’s requirements. This can be done with words, but it is much easier and more accurate to have help of visuals on screen or on paper.
Few people without a trained eye can easily and quickly find their way around technical drawings.
Therefore, the visualization often shows the design in a perspective that is far more comprehensible to the average user.
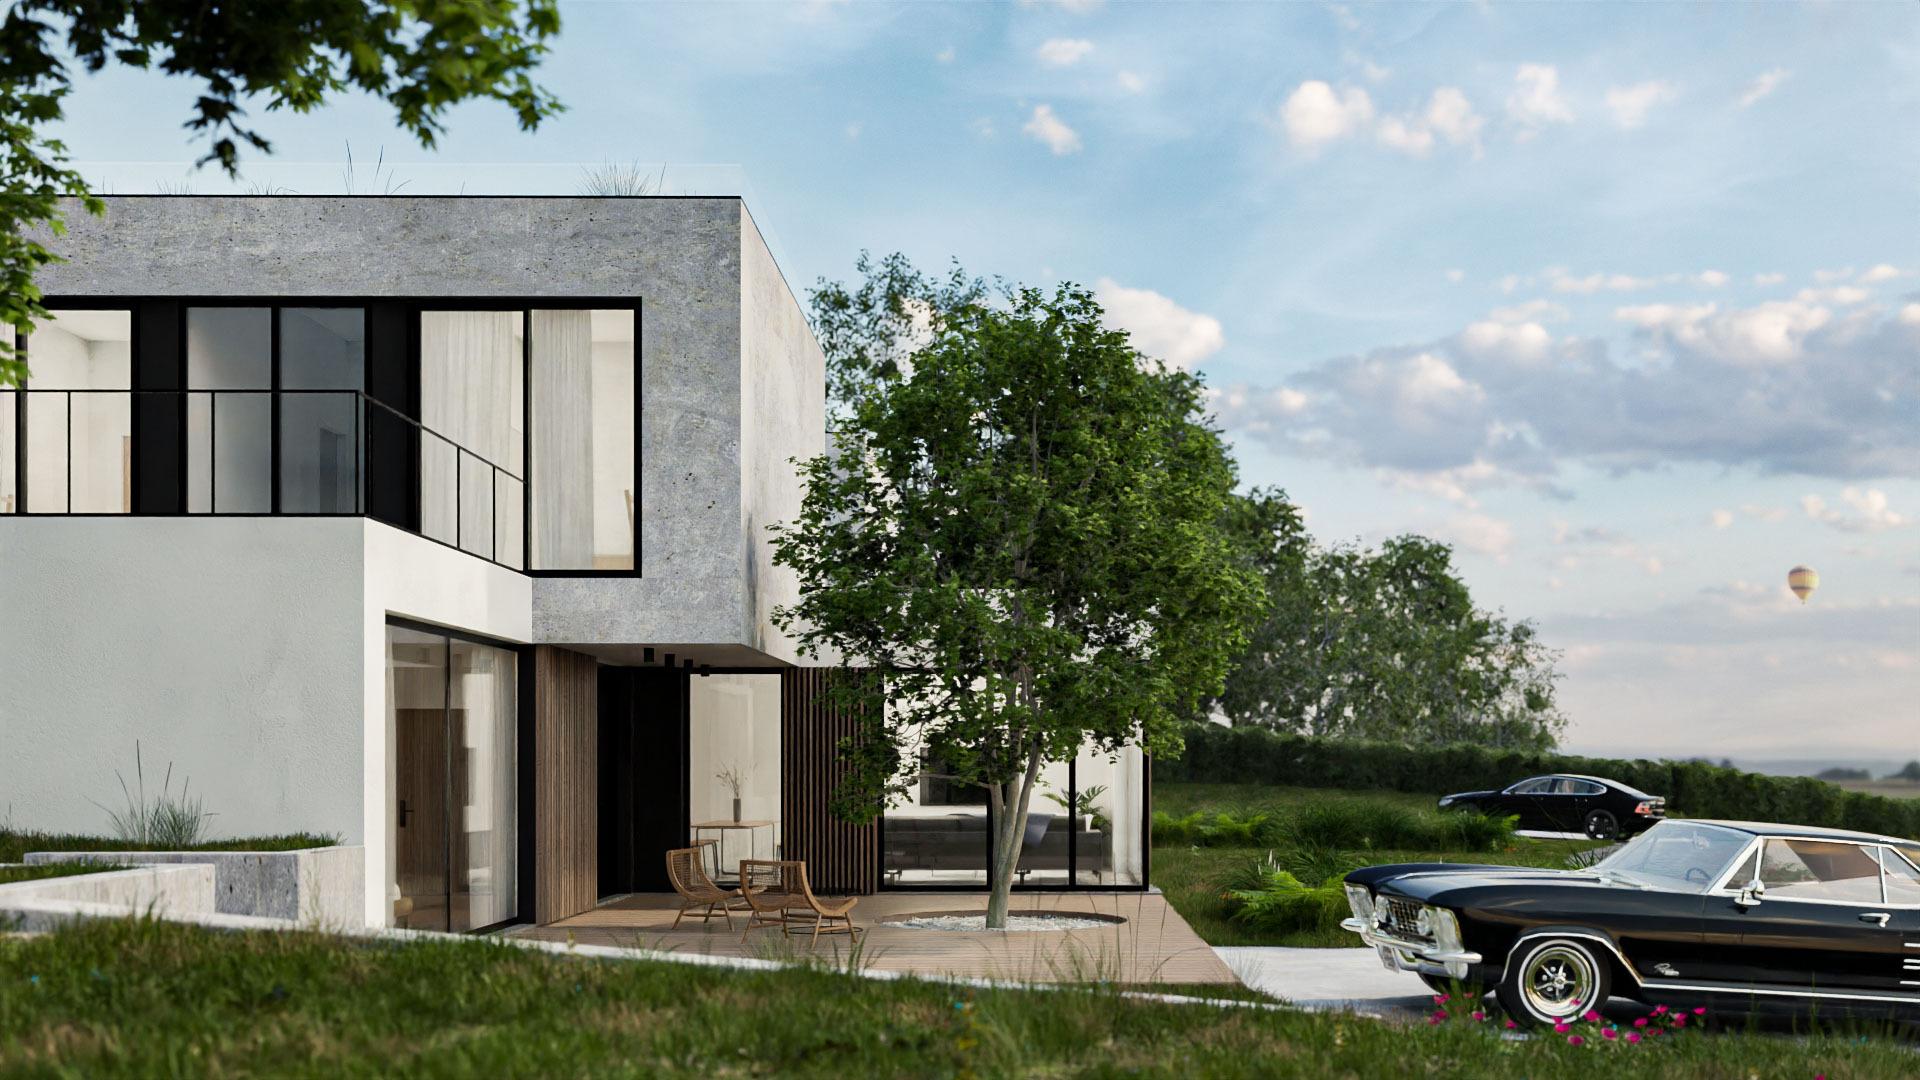
In this way, the client sees his house in an essentially realized state. Facade, garden, all materials on site. Classic biconvex perspective, realistic colors and materials, a little light and the client immediately knows what it is about.
In this way, nothing needs to be physically redone three times, and most errors and ambiguities are already resolved “on paper”. This is how the perfect version of the building is born in the dialogue between the client and the architect. This is the only way to create something truly tailored, where the whole family can spend happy decades.
Thanks to advances in the IT sector, it is becoming increasingly easy to create a very realistic, computer-generated image. As a result, this manifests itself as a facilitating element for creating not only visualizations, but mainly virtual videos, fly-bys and “walks” in virtual reality. What a 200,000 computer could barely handle five years ago, today even a 30,000 computer can do better. Thanks to this, the software is also more specialized in virtual videos. These factors also very briefly indicate future visualization trends. Maybe that way we’ll see video tours of your house more often, rather than a still image, sketch or atmospheric collage.
In this regard, our studio keeps up with the times, so we create fly-by videos in addition to static perspectives for selected projects. You can see them on our YouTube or in the feed on Instagram.
In this short article, we decided to briefly introduce the process of creating static visualizations and videos.
Phase I.: Designing
The first phase is design and engineering.
The architect typically enjoys considerable creative latitude when it comes to shaping the fundamental concept of a building. Key determinants include external factors such as the layout and characteristics of the site (designing on level ground in Prague differs from working along a slope in the foothills), the historical context of the location, and, most importantly, the specific preferences of the client. Indeed, a myriad of factors is carefully considered in the architectural process.
A kind of dialogue is created between us and the client. An architectural design is made, the client says what he wants differently, we fix it, he reacts… and so on and on. This is where it is decided where the entrance will be, whether the terrace will have six-meter windows on the south side, and also whether it is more suitable to make the slats from larch or just oak.
Thus, a rendition of the project gradually takes shape, ultimately evolving into what is deemed the final version. I assure you that even this ultimate version undergoes changes and adapts to prevailing circumstances over time. Occasionally, external factors like regulatory authorities or budget constraints come into play. At times, we may simply find ourselves dissatisfied with the earlier version, prompting us to opt for a remake.
Phase II.: Modeling
Visualization is usually created within the study – i.e. in a still relatively fluid version of the project. Every wall can change in a week, so it’s important to be ready to adapt. When I explain my job to my grandfather, I use this parallel:
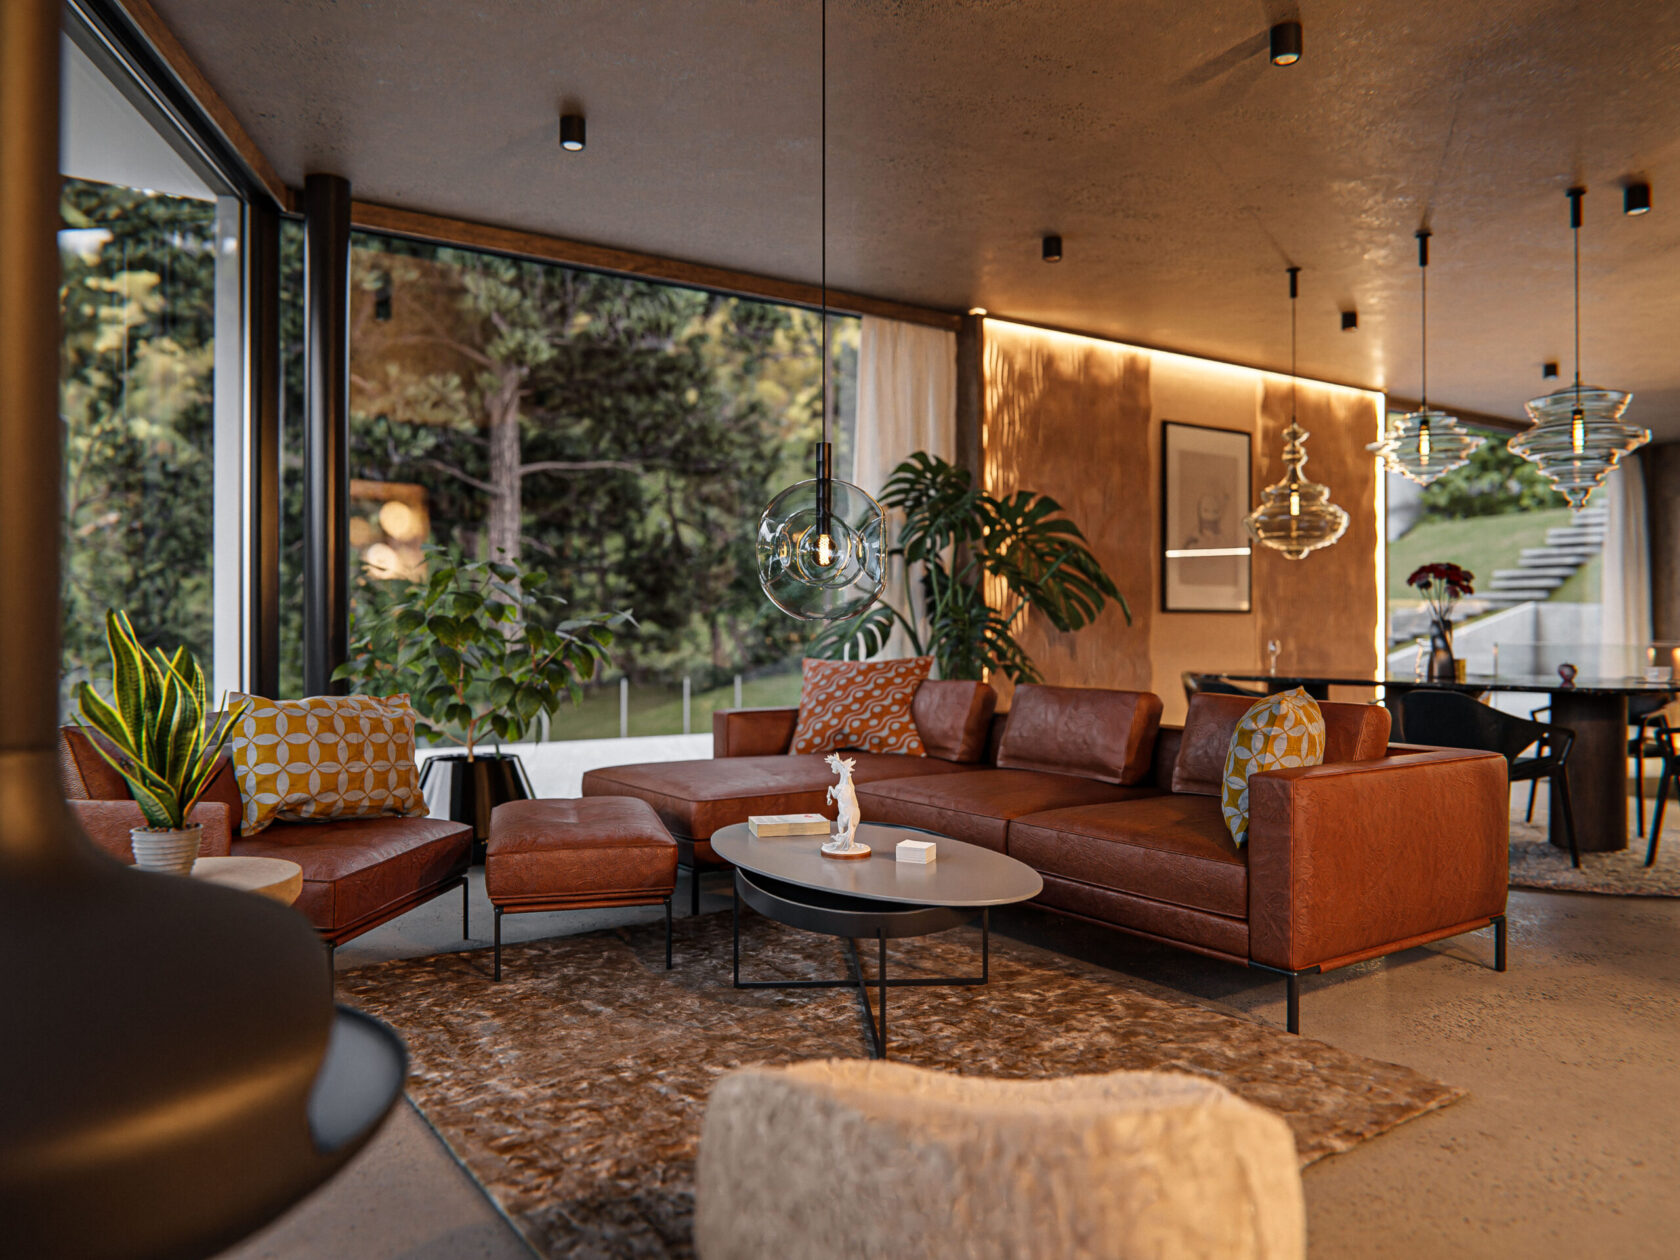
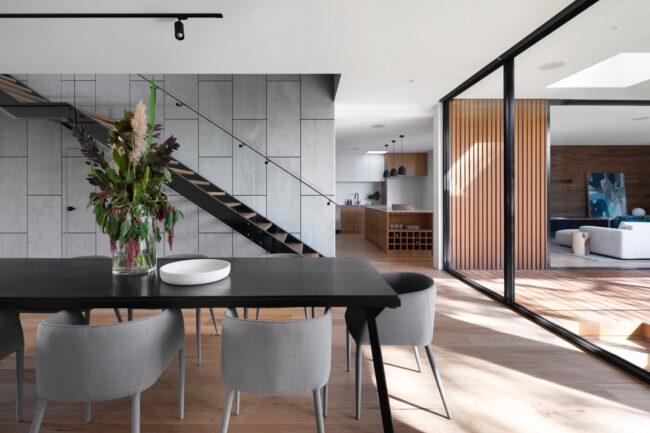
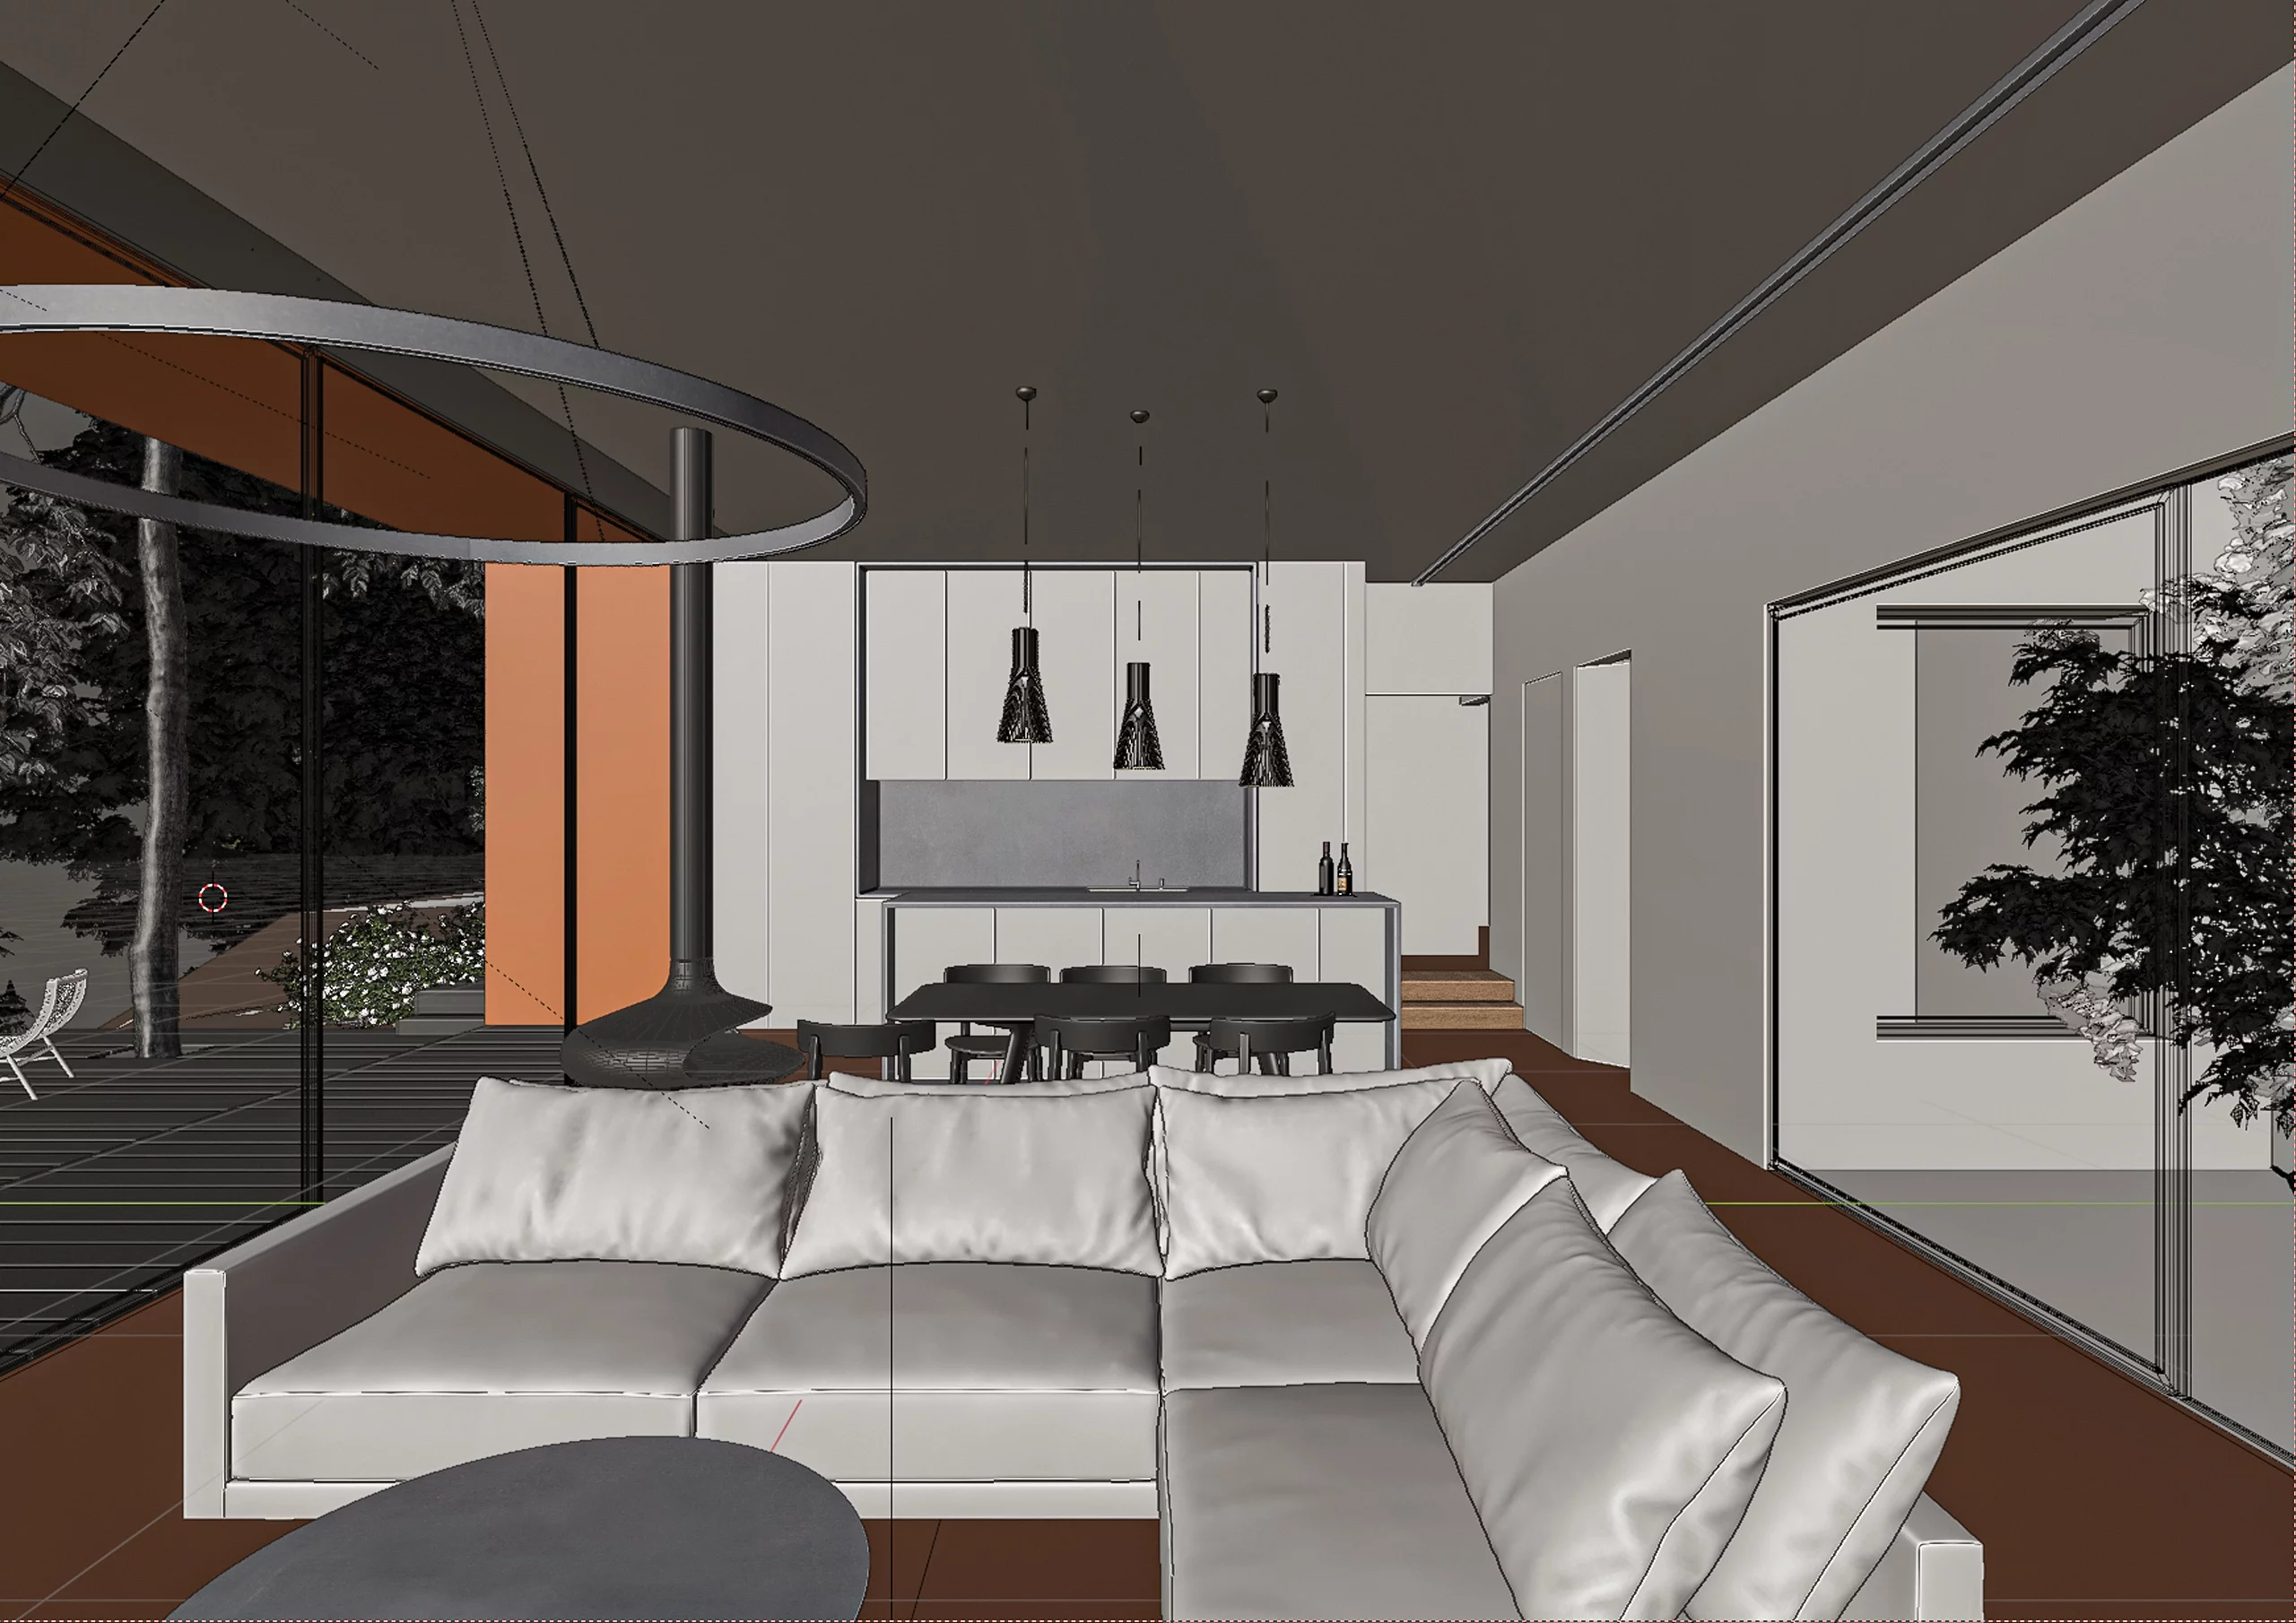
Envision having an architectural blueprint for a building detailed on paper, encompassing floor plans, sections, and material specifications. Now, picture yourself building a Lego model of the same structure on a table, giving you the freedom to create it the way you want. In addition, think about being able to recreate this model on a computer, where you can design everything from walls and ceilings to surfaces and terrain, making a complete virtual version of the scene shown in Image No. 2.
In our studio, we mainly use Blender 3D, which is a program specifically for 3D modeling. Paradoxically, the same program can be used to create animated films, figures for games and much more. There are competing programs such as SketchUp, Maya, Cinema 4D, Rhino or 3DS Max. However, during my practice I always come across few differences between them and Blender. And since Blender, unlike other programs, is free and has an extremely active fan base, we can’t praise Blender enough.
When everything necessary is done in the modeling phase and the building has door handles, we can start coloring our lego model as we need.
Image No. 2 Interior visualization in Blender 3D
Phase III.: Texturing and scene preparation
After modeling, we have to complete the scene somehow. We need to give the objects a color (material) and add more complex objects like trees, grass or curtains. Equally important is the composition of the scene, i.e. the distribution of materials in the resulting image.
Texturing and adding materials is purely about making one digital cube look like it’s made of wood and the other like it’s made of glass. In simple terms, one of them gets a “coat” of wood material, and the other gets a “coat” of glass. The software automatically manages the lighting on the wood surfaces and handles the reflections and transmissions of glass. In Blender we use the render Engine “Cycles”, which is simply a method for the computer to calculate light reflections and the behavior of surfaces in a the 3D scene. So when we go back to the Lego model, we just take the bedside lamp and put it next to the model on the table and try what this light and this material does on the surface of the model. Of course, everything can be tested very quickly, so it is quite simple to set up and assign the material to each part of the model (see video no. 1).
So we have a “physical” aspect (in quotes, because I find it absurd to call something in a virtual 3D model “physical”), which are masses such as walls, tables, chairs, lamps, armchairs, cutlery, trees… These objects have prescribed properties – material, color, reflectivity, roughness and so on.
The layout of items is also easily changed at this stage. Composition is more important than color. The scene has to be pleasing, it has to be thought out and, ideally, it has to communicate something about the function and concept of the place. How many times is it better to capture a more detailed and smaller part of the space up close than to try to fit everything into the picture.
When the model is built, the visualization of the facade is complete and the chandelier shines from the ideal angle, we take the camera, stand from the right side and take a picture of the model. It’s easy in reality, but how does it happen in a virtual space based on ones and zeros and silicon chips?
Phase IV.: Render and post-processing
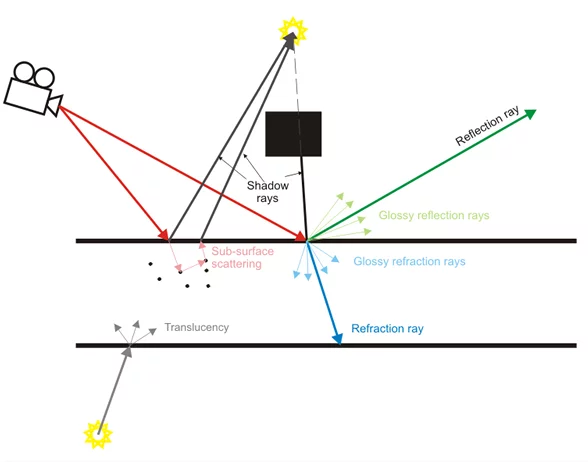
When we shine the lamp on the white lego wall, the yellow light of the lamp is reflected on the table, slightly brighter, because it met the white wall along the way.
Before light hits people’s retinas, it bounces off a myriad of objects, materials, colors, air molecules, loses brightness when a color absorbs it, changes length, and scatters in all directions when it passes through water. Humans are so brilliant that they have described, analyzed and parameterized these properties of light and materials of physical objects. Thanks to this, we can make a relatively accurate “light simulator”, a kind of virtual light chamber.
Rendering simulates the same process, only with virtual parameters.
This process takes a very long time. Before the computer renders an image of the virtual interior, it must calculate all the variables. He simply imagines a light source there and calculates how the light goes from it to the lens of the virtual camera. It’s so easy, yet so complicated. I only explain this to point out how amazing and challenging “rendering” is.
If we have one color of light of a certain intensity, it bounces off a straight white wall once, and we are interested in the state in which the light reaches the camera (that is, how we will see it all), it is not a very complicated equation. I hope you agree with that.
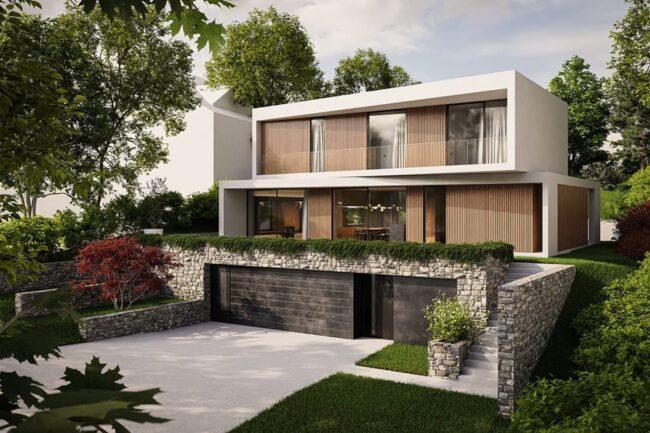
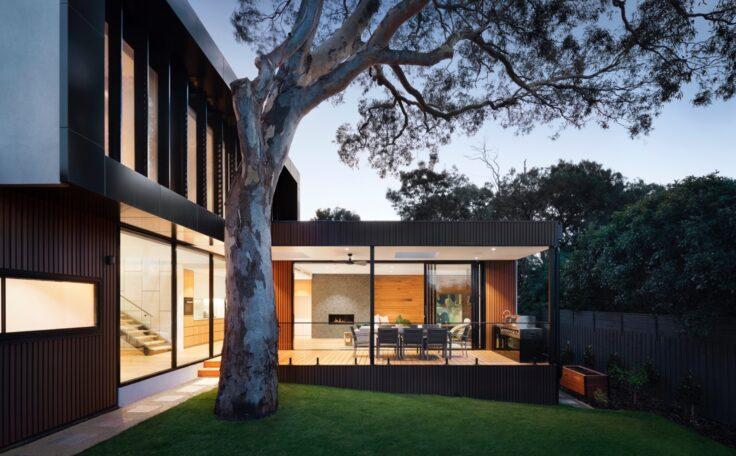
Now imagine a more complex scene (see Figure 2).
How many surfaces that reflect light and therefore the computer has to calculate them do you see? How many different materials, how many reflections must take place? Do you understand where I’m going? One such image takes tens of minutes with this type of rendering (Light path tracing rendering).
But the finished product after such a time is worth it. We have fully realistic light, color and color mixing. If the scene is cleverly constructed, the result is truly beautiful.
Subsequently, the created CGI image is edited using programs such as Photoshop. This will only finalize the color, exposure, saturation and other details. A relatively flat image can thus become a color-balanced, interesting creation that is pleasing to the viewer.

Phase V.: Video
A video is a sequence of still images. The human eye already sees continuous movement at 24 frames per second. Just how we operate.
In order to get video from a 3D program, it must render at least 24 frames for every second of video length. Now consider this information in the context of render time. As I mentioned before, one picture can easily take hours. So let’s try how long it would take to render a one minute video. 60 seconds is 24×60 frames. That’s 1440 frames. If we had a very powerful computer (price 100,000 CZK and above) and were lucky that the scene is not so demanding, we could get even 15 minutes per picture (FullHD). That’s 360 hours (15 days !!!) of time per minute video! It’s really not worth it. Of course this calculation differs with each hardware update, so we can instead of hours count minutes for one frame. Anyways, its time consuming.
That’s why (and mainly because of the game industry, where seconds matter) the so-called “Physically based rendering” was created, which is considerably faster. It is used, for example, by the Lumion program, which is very well optimized for the architecture. There is no modeling in Lumion, only the entire scene is put together. (see video 2). You take ready-made objects, walls and shapes and use them to compose an entire scene. So it is essentially phase III. and IV.
You apply materials and individual elements and render the entire creation. Thanks to the calculation based on the properties already in the materials (the materials automatically contain, for example, reflective information), we will drastically reduce the rendering time, and a one-minute video will not take us more than 48 hours. In Lumion, light rays no longer “fly” around you and bounce off all objects until they reach the camera. In addition to many advantages, this method also has disadvantages, such as different light in the final visualizations and slightly worse mixing and merging of colors (objects sometimes tend to stand out from the overall image).
You can easily compare the difference between these two methods on the project of a family house in Vlastějovice. Dan wrote a nice article about this project by the way.